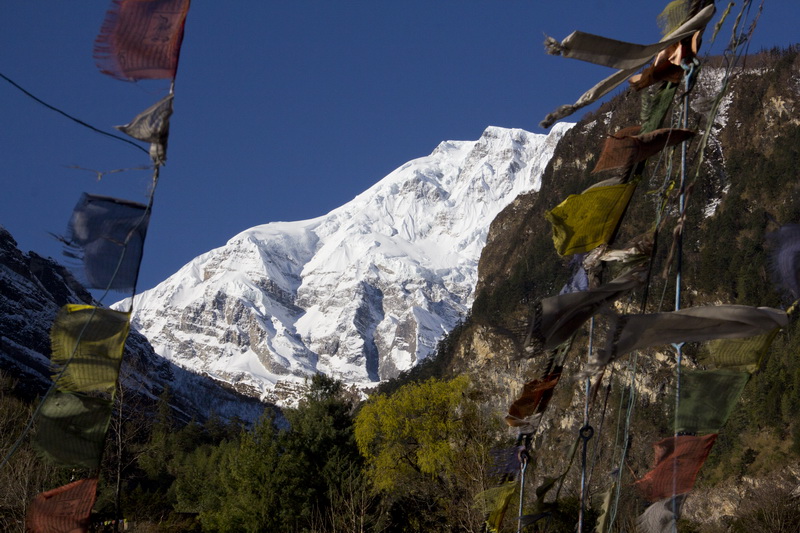
This year we walked the trek around Annapurna in Nepal and the trek from Jiri to Everest Base Camp through the Gokyo Lakes and we want to share the nuances of these treks.
Since we do not use the help of any travel agencies, but do everything on our own, sometimes we stuff bumps and get additional experience, which we want to share so that you get into less difficult situations. This article contains tips and recommendations for preparing for independent trekking in the Himalayas, or rather trekking in Nepal.
When to go on a trek in Nepal?
The good seasons for trekking around Annapurna and to the Everest Base Camp are considered to be the middle of March-April - early May (at this time everything is just beginning to bloom, but the weather can be unpredictable - from simple clouds to excellent weather or vice versa rains) and October - November - mid-December (autumn colors, clear skies, although everything it happens...).
Also, some people like to go to the trek in the summer, but this option is not suitable for everyone, because the rainy season is in summer, which means that the views will not be the best, and you will almost not climb out from under the raincoat. But the trek is almost completely empty and the prices are good.
We started on the trek around Annapurna in the middle of March and this year has been quite snowy... And the report with photos can be viewed here. (it will be a little later)
And the report on the trek to the Everest base Leg can be viewed here. (it will be a little later)
How and where to Get trek permits
Almost all popular treks in Nepal pass through protected areas and territories protected by the state. The Annapurna massif around which the trek passes is located in the Annapurna Conservation Area or ACA. This means that you will have to issue a permit (permit) and pay money. But the good news is that in Nepal this case has been put on stream and does not cause problems.
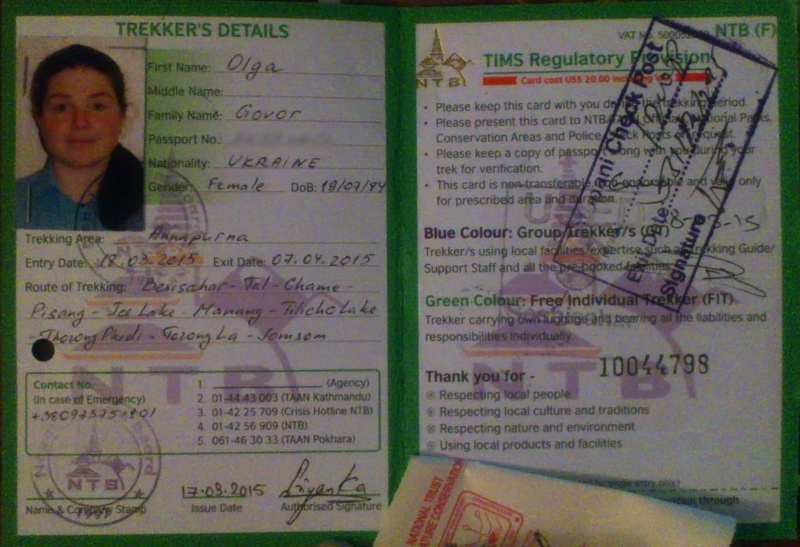
First, for any trek, you need to get a TIMS treker card (trekers’ Information Management System). This card contains who you are and where you want to go, in theory, registration at points along the route should further facilitate your search if you get lost, but in practice there are many trails / roads and not all are marked at all points, and the system in the form of barn books will not allow you to quickly determine which one You are lost at the site. But... you need to register TIMS because it will be checked more than once. It costs $ 20, you can pay in both dollars and Nepali rupees, the amount in Nepali rupees changes every day depending on the exchange rate.
And one more unpleasant moment, we thought that we would get TIMS once and go to both treks with him, but it was not there for each trek its own TIMS, which means 2 times for $ 20.
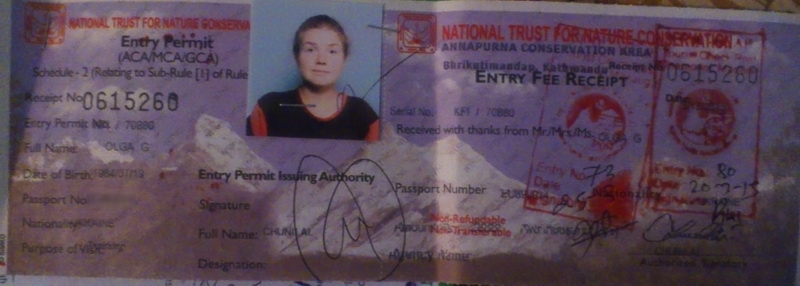
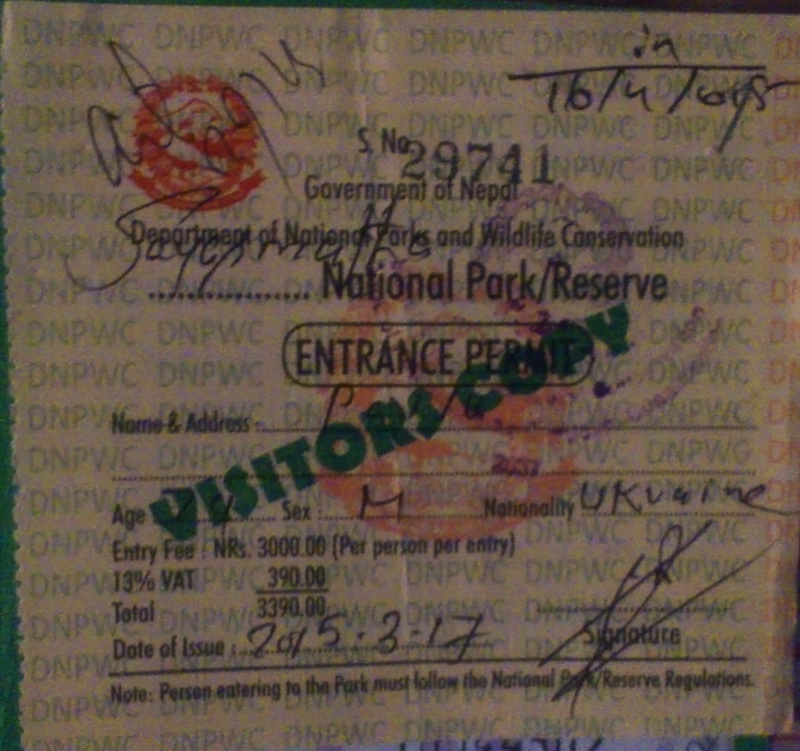
Secondly, for each specific trek, it is necessary to obtain the actual trek permit or permit. Their prices vary. A permit to visit the Annapurna Conservation Area will cost you 2000 Nepalese rupees ($20), but the entrance to Sagarmatha National Park is already 3390 Nepalese rupees ($34).
You will need a permit to visit the Annapurna Conservation Area if you choose to hike to the Annapurna base camp or the trek around Annapurna, but if you are going to the Upper Mustang, you will have to apply for a separate permit there.
Both permits and TIMS are ready to do at any travel agency in Kathmandu and Pokhara, but in fact they will also go to the management of the Nepal Tourism Board and do everything that you could do on your own. and they will take another 10-20 dollars for their services. The only case when it is convenient is if you don't have time at all - that is, you arrive in Kathmandu in the evening and leave for the trek the next day in the morning. Then you can contact such agencies in advance, provide them with all the data and you will be met at the plane or at the hotel with all the necessary documents.
If you have one day, then in the morning you can arrange all the necessary documents, see some sights and still have time to get the necessary equipment in the shops of Thamel.
The trek permit and TIMS card are issued at the Nepal Tourism Board office (GPS coordinates 27.701927, 85.316989), which is located 20-25 minutes leisurely walk from Thamel. Nepal Tourism Board is a fairly large detached building, in the courtyard of which there is even a monument to Tenzing and Hillary. This place is open every day, including weekends, from 9 a.m. to 3 p.m. It is closed on major holidays, but do not forget that the dates of our and Nepali holidays are different.
You can go around the building on the left and enter the glass door or go through the central door and turn left. First of all, you need to get TIMS, to do this, fill out a questionnaire, glue a photo and, together with the second photo and give $ 20 to the girl at the counter, and she will already issue TIMS to you or give you a form and ask you to fill it out yourself, and then just put a seal. By the way, it costs $ 20 for individuals TIMS, and if you go in a group with a local guide, the cost of TIMS is $ 10.
Permit for the trek around Annapurna
Next, the permit for the trek. Two photos are needed for a permit in the Annapurna Conservation Area, but for some other national parks photos are not needed at all. If you have run out of them or did not have them initially, then there is an opportunity to take a photo for free and print a photo right there on the spot, for this you need to contact the girl responsible for the TEAM.
Fill out a questionnaire corresponding to the national park you are going to, take a photo (if necessary) and money and go to the appropriate national park room. There, either immediately or after 5 minutes, you will be given a permit.
Permit for the trek to the Everest base camp
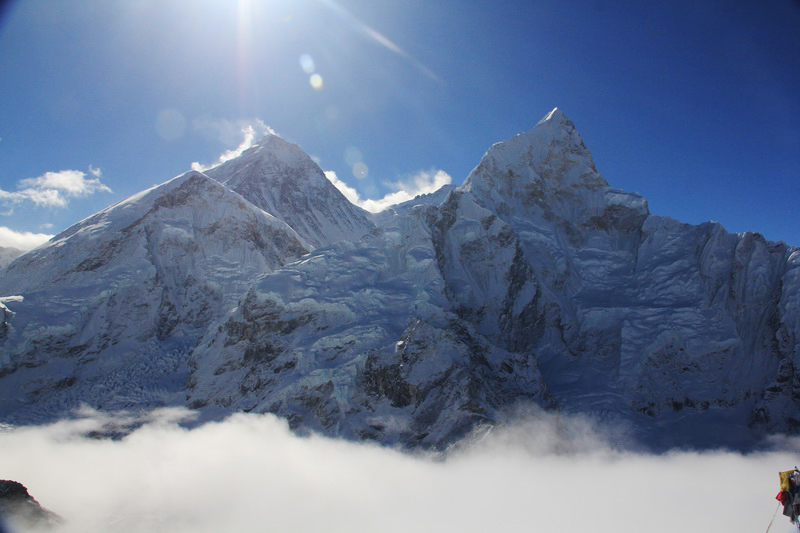
If you start the trek to the Everest base from Lukla, you will need to issue one permit - to enter Sagarmatha National Park.
But if you want to walk the trek along the path of the pioneers - from Jiri to Lukla and then to Everest, you will also need a pass to the Gaurishankar Conservation Area.
The permissions look completely different. For example, for ACA and Gaurishankar Conservation Area (GCA), you will be required to take two photos and a photo will be pasted into the printed permit.
But in Sagarmatha National Park (Everest is located here), you do not need a photo and the permit looks like a piece of paper consisting of two parts, one of which will be torn off at the entrance to the national park.
Permit prices:
- Annapurna Conservation Area (ACA) - 20$
- Gaurishankar Conservetion Area (GCA) - 20$
- Sagarmatha National Park (SNP) - 34$
And also look carefully at the map. You need permits to all national parks and protected areas through which your trek passes. Although if you enter the national park at an altitude of 5000 and do not go down in it, but go further away, then there is little chance that someone will check your permit, but still it is better not to take risks. By the way, if you apply for a permit in the SNP at the entrance, the price will be the same, but in the ACA it is twice as much...
Guides and porters on trekking in Nepal and how to do without them
About half of the tourists go to the trek accompanied by a guide and porter (porter), this is especially common among foreigners. It is common among tourists of the post-Soviet space to go with a guide from their country - sometimes it is not bad, but if you know 10-15 basic phrases in English and can understand what you have been answered, then you do not need a guide.
Porters are people who carry goods, sometimes such people are called Sherpas, but this is not true. Sherpas are a nation, and porter is a profession.
Every morning, the porter takes his cargo (it can only be your belongings, or maybe several people from your group, usually the total weight does not exceed 20 kg per porter). And he goes and carries. Sometimes next to you, sometimes at your own pace and meet only at the end of the running day at a specified point. Such services cost 15-20$/day (at least in the spring of 2015 we met people who had porters at exactly this price).
Of course, it's very tempting to carry a camera around the trek light, but on the other hand, to give away such an amount of money for almost nothing... After all, if you take only what is required, then the weight of your backpack is unlikely to exceed 8-9 kg plus a camera and everything you need for it (I usually have a 2.5kg trunk and a 1.5kg tripod)
A guide, but what should a guide do? In theory, you should come to an agreement with this person long before the proposed trek, he should work out the route, think everything over, and agree on housing... In fact, the guide is found upon arrival in Kathmandu, the trek is already known to everyone, the guide will simply tell you where to turn off and duplicate the signs, and you will most likely live in lodges that the guide chooses, i.e. not always cheap... The cost of guide services is about $ 20 per day. So it's up to you...
On popular treks (and it is unlikely that you will start exploring Nepal from others) everything is very well marked, everywhere there is information about the time it takes to overcome sections of the path, and all this information is available in the Nepal Tourism Board in the form of free brochures, which means you can always plan your day yourself. There are signs on all or almost all branches, and if there are none, then in the season, it's enough to take a break for 5-10 minutes and a group will appear that knows exactly where to go or if you understand maps, then decide for yourself. The map, in principle, is still necessary at least in order to find out which village is on your way next. As for hotels, it is always possible to find places, unless you have a company of 30 people, you go in the season and want to spend the night in one place... But even in this case, you can simply ask the owners in the previous village to call and book you a place in the next village, but usually there is no need for this.

Mountain sickness
What is it and what is it eaten with? In simple terms, altitude sickness is the body's reaction to altitude, or rather to a sharp change in pressure. Note the sharp one, i.e. if you carefully and competently gain altitude, then everything will be fine.
What does a competent climb or acclimatization mean? This is that it is not advisable to gain more than 500 m in height per day, and every 1000 m of height to do a day of rest, naturally not passive, but active. It is advisable to gain more altitude, but return to spend the night at the same height.
Accommodation in Kathmandu, hotels, lodges and other guesthouses
You will have to spend at least a couple of nights in Kathmandu: one upon arrival and one before departure, which means you need to live somewhere. The entire concentration of tourists, tourist shops, hotels and cafes/restaurants is located in the Thamel area. You can easily get to it by taxi directly from the airport in 20-25 minutes, on foot about 6km. At the airport, they offer a prepaid taxi for 700 rupees ($7), on the street we bargained for 300 rupees ($3) (prices for March 2015). But to be sure that you were taken to the right place, download the maps of Kathmandu to your phone and see if the taxi driver brought you there. It is better not to agree to offers to take you to a cool hotel.
There are a whole lot of hotels in Thamel for every taste and budget, it's up to you to decide what you need. And most importantly, almost all hotels have something like a luggage storage room and during the trek you can leave some of the things that you do not need at the hotel.
Right on the streets of Thamel there are a bunch of barkers who call to their hotel. You can go with the barker and see the room, but you don't have to agree right away, it's better to walk around and see what else there is. And also in Kathmandu hotels, you can bargain for the room price, it certainly does not fall twice as in India, but you can bring down $ 1-3. The price for a double room with amenities starts from 500 rupees ($5) and ends with simply incredible amounts. But on average, a room in a decent hotel can be rented for $ 7-10.
P.S. Even after the spring earthquake, there is almost no destruction in Thamel and all hotels, shops and cafes are open.
Start of the trek around Annapurna - Besisahar
Most often, the trek around Annapurna starts from Besisahar and it is in the direction of Besisahar-Manang-Torong La-Muktinath- and further., since if you go in this direction, the climb is very smooth and acclimatization is better - getting used to altitude.
Now there is a passable road from Besisahar to Bul-Bul, even buses go there. And then jeeps go all the way to Manang. But if tourists drive up, they drive no further than the village.
To be honest, you can already walk along the trail from Bulbul, and not breathe the dust of jeeps. And the trail runs along the other side of the river, which means that jeeps will not interfere. And you can also get to Bulbul by regular bus from Kathmandu, which departs early in the morning from the new bus station and costs only 475 rupees ($4.75). And by the way, our bus in Besisahar picked up a couple of tourists to Bulbul for 200 rupees per person ($2), which is less than the 10th part of the entire journey. So you should immediately decide where you are going.
The travel time from Kathmandu to Bulbul is about 7-10 hours. It depends on how many locals you pick up on the road ;)
Maps of trekking routes in Nepal
Maps of all routes can be purchased before trekking in Kathmandu, Pokhara and some large villages. The price usually starts from 300 rupees.
Where to live on a trek in Nepal?
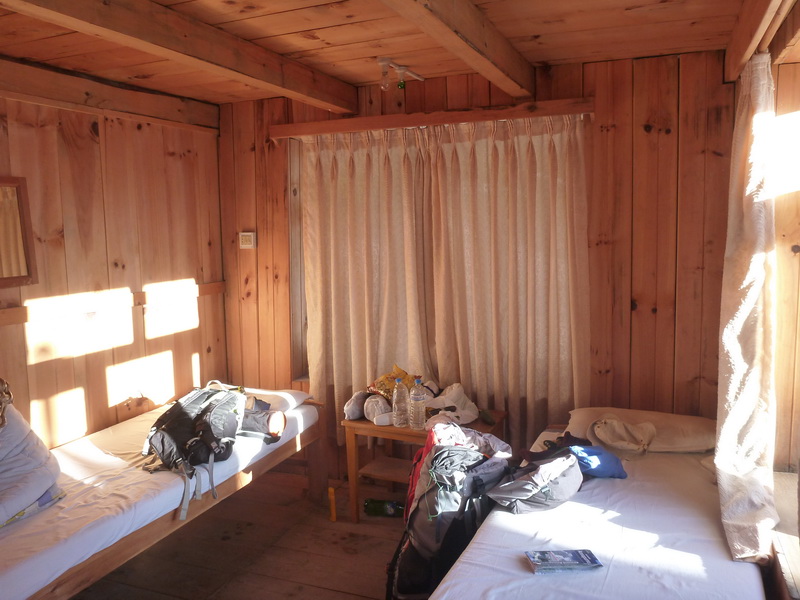
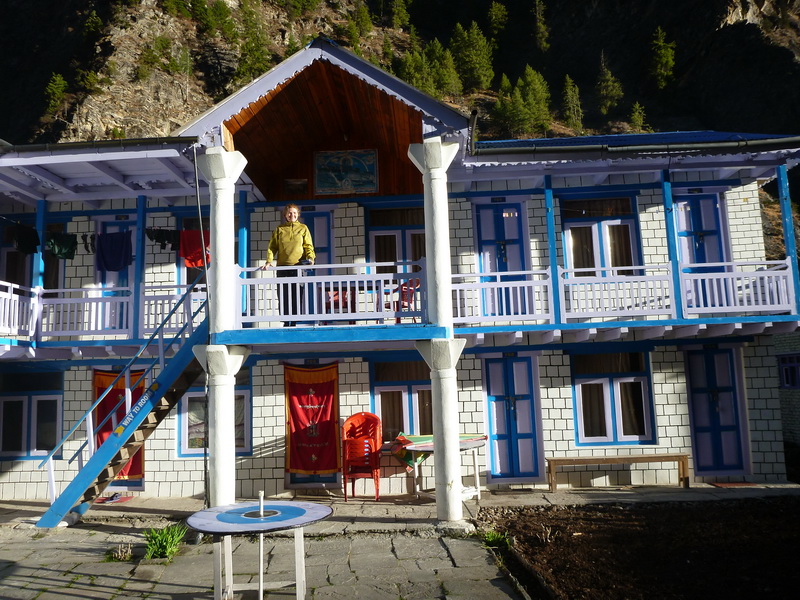
On the trek, most stay in lodges or guesthouses, which is essentially the same thing. On some lodges you may even find the inscription 'hotel', but this will not change the essence.
Usually you are allocated a small room for personal use, about 3 * 3 meters, with two beds (but there are single and triple rooms and dormitories, but not everywhere). In some places you can find rooms with amenities inside, but they are much more expensive.
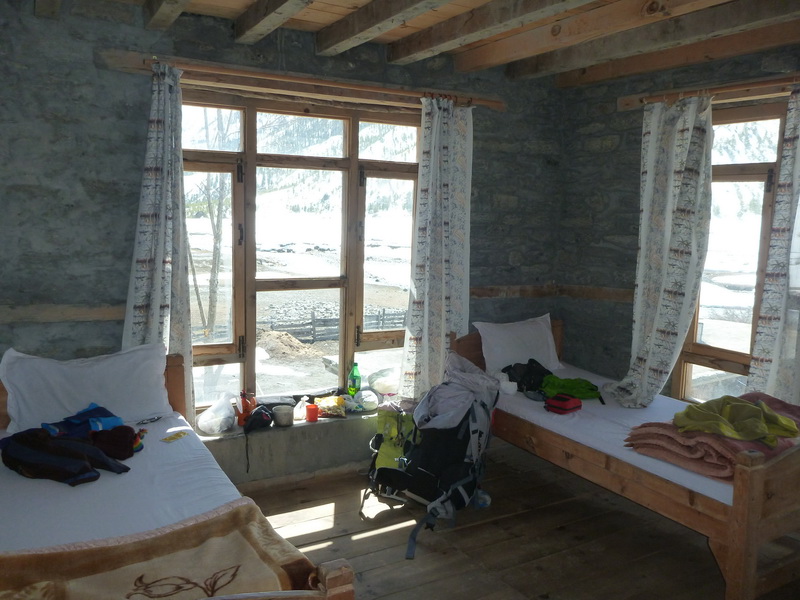
The bathroom may be in the house, or it may be outside, the same story with the shower. Therefore, if it's cool outside, then see if the cracks in the shower are too big.
Speaking of cracks. They are found in almost all lodges in both wooden and stone houses. It's just that in stone they are only between the frames and the walls, and they haven't heard about the fact that there is construction foam for insulation there.
Up to an altitude of 3500-4000m, you can find a hot shower on almost all treks, somewhere for a fee, somewhere for free, somewhere it can be a gas shower, somewhere electric (very rarely), and somewhere solar, i.e. heating water from the sun, which means it is not always warm, especially if 10 people have been there in front of you or the day was cloudy. There is also a so-called bucket shower or bucket shower. They just give you a bucket of hot water and splash in it even with the whole group. The cost of a shower varies greatly. We had to meet prices from 0 to 400 rupees ($ 4) per shower. But on the trek around Annapurna, we almost always agreed on a free shower.
There are not always sockets in the rooms. And if they are, they don't always work. But usually there are outlets in the common dining room. The higher the price, the more likely it is that the outlets will be paid. And prices go up to $3.5/1 device or 1 hour of charging. So it's always worth clarifying this before settling in. And even better, have a portable solar panel and a battery (we had an excellent Goal Zero Guide 10 Plus Adventure Kit) so that you can always recharge.
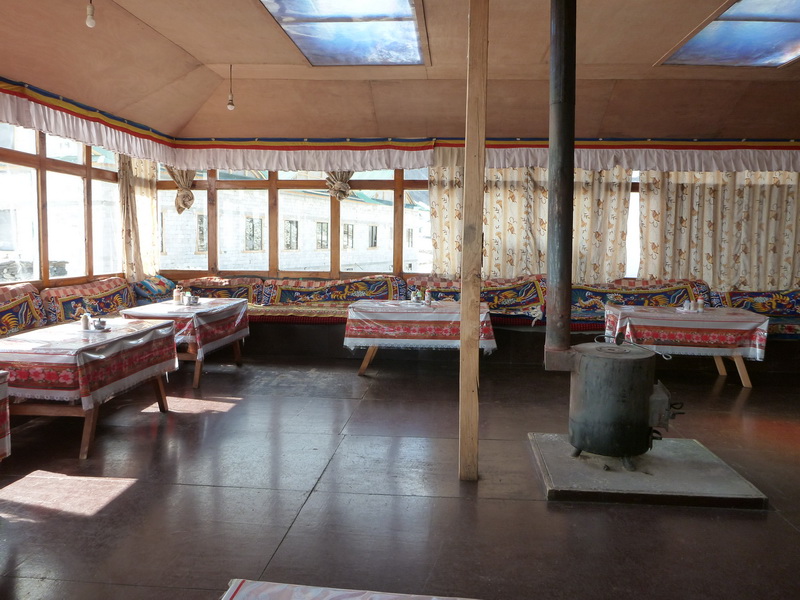
The cost per room varies and usually increases with height. You can and should bargain for the price of the room. Most of the time we lived for free, just had dinner and breakfast with the owners of the lodge. And in the villages, except in the lodges, there is not much place...And the lodge usually has a very cozy and often heated dining room, which is very valuable upstairs.
What to eat while trekking in Nepal
In all lodges, the owners provide food to choose from
Food on the treks of Nepal
When we were preparing for trekking in Nepal, we read a lot of reports. Some of them had only emotions and photos, but there were also useful reports with the time of passage, with the cost of acco...
Trekking Tips in Nepal
1) If you have something to charge — when moving into a room, always clarify the issue of sockets in advance. See if there are outlets in the rooms, and if not, then ask if you can use the outlet for free in the dining room or somewhere at the owners. It is very good if you have a small five in your group, since there are often not so many outlets. And as we have already written, the best thing is autonomy with the help of a solar battery.
2) You can often find the statement that you need to eat in the same place where you live. In fact, everything is consensual. Although it is written by many that if you eat elsewhere, the cost per room will be much higher. And even if you still plan to eat with the owners, then the phrase 'we will take dinner and breakfast from you' works great when trading for the price of a room.
3) Prices for food and drink on the trek are rising with every meter up, but not always.
On the trek you can find prices that are comparable to a good cafe in Kathmandu. This is all because food is delivered by jeeps, yaks, horses, helicopters, and sometimes just with the help of porters. This means that the more remote a point is from a village with roads, the more expensive it is.
The institution that issues permits for the trek around Annapurna plus the local community develops the menu and approves the prices in it. This means that the whole village will have the same menu and the same prices. But this does not mean that the portions will be the same, plus the conditions in the gests are different. However, starting with Braga, it absolutely did not work and the menu and prices were different. And in Manang, prices in general sometimes differed 1.5-2 times. On the trek to the Everest Base Camp or Gokyo Lakes, the same price rule does not apply at all.
For example, we chose the lodge according to the prices on the menu, because everything else was not too important to us :)
4) If your budget is limited, then there are a few tricks that will allow you to save a little.
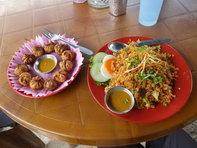
a. The dish "Dal bat" (Dal Bhat). This is what is called "tali" in India. They bring you a huge plate on which there is rice, lentil soup, vegetable curry. Sometimes some other vegetable delights, sauces and so on are added. The trick of this dish is that you can ask for an addition to it. But usually it's just one supplement and that's enough. But the Dal Bat becomes profitable to take only at high altitude, where its cost is almost comparable to an ordinary dish. And at the bottom, for the cost of a Dal Bat, you can take two different dishes, each of which is not much smaller than the original portion of a dal bat.
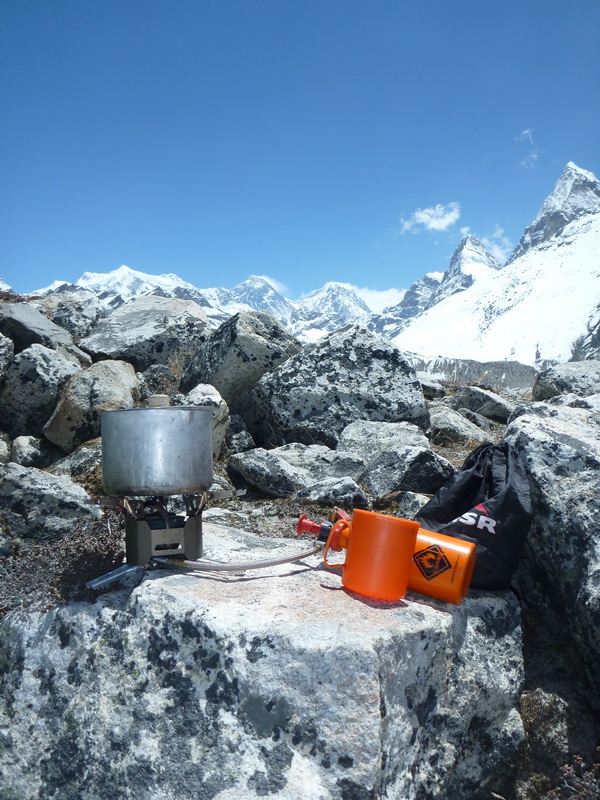
b. Tea bags. You can simply order boiling water and use your own tea leaves. You can also add a boiler / burner (and a mug, of course). True, the boiler will only help in places where there is an outlet, but the burner is a little heavier and larger, but you are provided with boiling water everywhere and for free.
c. Drinking water on the trek is sold in bottles or special bottling points and keep in mind its price is only increasing. But since we are in the mountains, you can drink from almost every stream or waterfall. Or ask the locals to pour you drinking water - they drink it every day, plus they have it piped from higher mountain sources, and anyway everything you will eat is cooked on such water. Most often, we took water from the kitchen in the lodges where we lived.
5) It is better to go to the trek early in the morning. Some people advise going out almost at 6-6:30 in the morning, but at 7-7:30 it will be quite enough. Firstly, you will not walk in such a crowd, secondly, you will come to the lodge for an overnight stay around 12-14 o'clock and you will have plenty of time to eat and wander around. Thirdly, almost all lodges will be half-empty and you will have more choice.
What to take with you to the trek
1) Good sturdy shoes. You should not leave your purchase at the last moment before leaving, and even more so, buy shoes in Tamel. Shoes need to be carried and plus you need to be sure that they will not fall apart on the second day, which means fakes from Tamel are not suitable.
2) Sneakers or light sandals — so that your feet relax in the evening, and you need to go to the shower in something.
3) Warm socks - you can buy them in Thamel, or you can bring those that your grandmother knitted, and you can also take fleece or down socks - the main thing is warm, so that your feet do not freeze at the top.
4) Hat and gloves. - I walked the entire trek around Annapurna without gloves and without a hat, gloves would only be useful to me at the Torong La pass. But Pasha used both a hat and gloves much more often... So it's worth taking.
5) Clothes. It's up to you to decide what to take, but usually it's a hiking kit for warm weather - shorts + a T-shirt. Set for cold - pants, fleece +windbreaker /windstopper. In general, with this set of clothes you should be comfortable in the temperature range from +30 to -20 and for 2-3 weeks.
6) Something sweet. Sweets are quite expensive on the trek, but you just want to put a caramel in your mouth or eat dried apricots at a rest stop. In general, something for snacking, energy-intensive. You can buy all this in Thamel, but it is very expensive. Therefore, take our advice from home.
7) The lantern. At least it will be useful for early exits of their High Camp (Annapurna trek) or Kallapatar (EBC trek). Well, or just go to the toilet if it is outside or there is no electricity in the room.
8) A knife.
9) Boiler/burner and mug
10) First aid kit - a minimum set, plus medications for personal ailments. We always take citramon to the mountains - the caffeine in it copes well with the first signs of altitude sickness, but you should not abuse it.
11) Greasy cream and hygienic lipstick - helps at altitude from terrible chapped lips and chapped face
12) Sunscreen - the sun is much more active at altitude than on the plain. And in the snow, such areas of the body burn that you didn't even think about... The protection factor is at least 30 SPF.
13) trek map. At least to know which village is next and how much height you need to gain. But remember, many maps have gross typos and the height may differ from the actual one by almost a kilometer...
13) Sleeping bag. It is worth taking for personal comfort. Although blankets are provided in lodges, they are not warm enough everywhere, and bed linen is often not changed every day.
14) The money is in Nepali rupees, for the entire duration of the trek. In some places you can find places where you can pay with a bank card, but there are very few such places and the Internet may not work.
15) Passport. I like to have my documents with me...
16) Trekking poles are for an amateur, if you have never walked with them, then most likely you will not be comfortable with them. But I have problems with my knees on the slopes, and I just feel more comfortable with them...
15) Sunglasses are also worth grabbing, even if you don't usually wear them. In places where there will be snow, there is nowhere without them.